Get Free Trial Week Developer Access, Try Before You Hire. Click Here to Claim Now

Better way to design UI in React Native

What is React Native
It is right to state that cell phones are the half soul of each person and with regards to Android development or iOS development,, organizations frequently get confused whether they should offer their consumer, a application with User Interface (UI) and exceptional User Experience (UX) or applications that are perfect with various stages and are quicker to create in any case. Also, henceforth, there comes the REACT Native Development in the image!
React Native causes you make genuine and exciting applications with the assistance of JavaScript just, which is supportable for both android and iOS platforms. Simply code once, and the REACT Native applications are accessible for the two iOS and Android platforms which helps to save development time.
UI for mobile apps
Building a User Interface (UI) for mobile apps is more difficult than doing the same for a web app. The reasons for this are :
1.Mobile devices have limited screen size.
2.Each type of mobile device (tablets, smartphones etc) is different from the other and they all require various kinds of support.
3.Android and Apple have their own respective platform standards that a developer should follow. So an app built to work on
Android devices will need its code to be changed in order to run on Apple devices
React native provide platform which is available for the two iOS and Android.
How can we design UI in React Native:
Code for UI once, and the REACT Native application is accessible for the two iOS and Android . It can runs both of device iOS and Android.
For example let’s take a button component
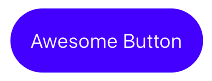
This component has two parts: the caption which says “Awesome Button” and the blue box with rounded corners surrounding the caption. In React Native, the box is declared in and the caption is declared in as shown below.
Code:
class Button extends React.Component {
render() {
return (
<TouchableOpacity
style={{
backgroundColor: "blue",
padding: 20,
borderRadius: 50
}}
>
<Text
style={{
color: "white",
fontSize: 20
}}
>
);
}
}
Style can be declared separately instead of doing it inside the class.
const styles = StyleSheet.create({
box: {
backgroundColor: “blue”,
padding: 20,
borderRadius: 50
},
text: {
color: “white”,
fontSize: 20
}
});
class Button extends React.Component {
render() {
return (
{this.props.title}
);
}
}
How To Design UI
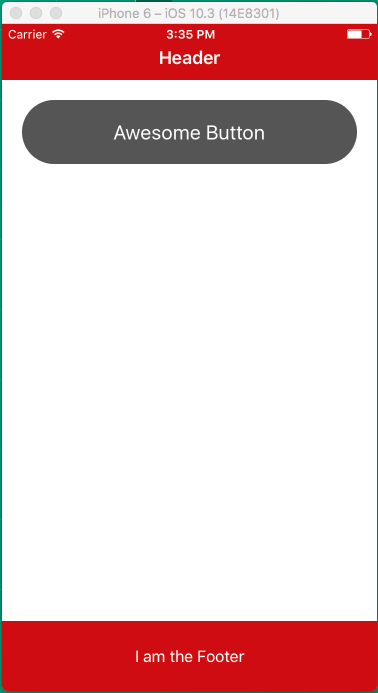
Let’s try creating an UI using React Native.
A screen has 3 basic parts:
Header
Content Area
Footer
is used for header and footer and is used for content area. is same as with the exception that the user can scroll with .
Here is the code for build an UI of header, content Area and footer .
class App extends React.Component {
render() {
return (
Header
I am the footer
);
}
}
FlexBox:
Flexbox is designed to provide a consistent layout on different screen sizes.
You will normally use a combination of flexDirection, alignItems, and justifyContent to build the right layout.
flexDirection :
Adding flexDirection to a component's style determines the primary axis of its layout. Should the children be organized horizontally (row) or vertically (column)? The default is column.
Try this code and check output for understand flexDirection.
import { AppRegistry, View } from 'react-native';
export default class FlexDirectionBasics extends Component {
render() {
return (
// Try setting `flexDirection` to `column`.
);
}
};
// skip this line if using Create React Native App
AppRegistry.registerComponent('AwesomeProject', () => FlexDirectionBasics);
justifyContent :
Adding justifyContent to a component's style determines the distribution of children along the primary axis. Available options are flex-start,flex-end,space-between,space-around,center.
Try this code and check output for understand justifyContent.
import React, { Component } from 'react';
import { AppRegistry, View } from 'react-native';
export default class JustifyContentBasics extends Component {
render() {
return (
// Try setting `justifyContent` to `center`.
// Try setting `flexDirection` to `row`.
flex: 1,
flexDirection: 'column',
justifyContent: 'space-between',
}}>
);
}
};
// skip this line if using Create React Native App
AppRegistry.registerComponent('AwesomeProject', () => JustifyContentBasics);
alignItems:
It determines the alignment of children along the secondary axis. If the primary axis is row, then the secondary is column, and vice versa. Available options are flex-start,flex-end,center,stretch.
Try this code and check output for understand alignItems.
import React, { Component } from 'react';
import { AppRegistry, View } from 'react-native';
export default class AlignItemsBasics extends Component {
render() {
return (
// Try setting `alignItems` to 'flex-start'
// Try setting `justifyContent` to `flex-end`.
// Try setting `flexDirection` to `row`.
flex: 1,
flexDirection: 'column',
justifyContent: 'center',
alignItems: 'stretch',
}}>
);
}
};
// skip this line if using Create React Native App
AppRegistry.registerComponent('AwesomeProject', () => AlignItemsBasics);
Finally, we can say that:
Building UI in React Native is quite similar to the web.
Flexbox is necessary to build better layouts in React Native.
Using third party libraries like NativeBase can help you save time that is used for development in React Native.

Nikhil Solanki
Mobile Lead
Nikhil Solanki has 10+ years of experience in App Development and currently works as the Mobile Lead at ManekTech. He is an experienced Mobile lead with a demonstrated history of working in Mobile's information technology and services industry.


Subscribe to Our Newsletter!
Join us to stay updated with our latest blog updates, marketing tips, service tips, trends, news and announcements!