Get Free Trial Week Developer Access, Try Before You Hire. Click Here to Claim Now

AR Object Detection and AR with Marker

In the following blog, we will understand what AR Object Detection and AR with Marker is. If you are new to this topic or even haven’t heard about the same. No need to stress out! Breathe, keep calm and we are here to help you sort things out. Just go on reading and welcome to the world of Augmented reality. So… before going into the depth of ARKit, let’s get to know about what is AR - Augmented Reality in simple words.
Augmented Reality
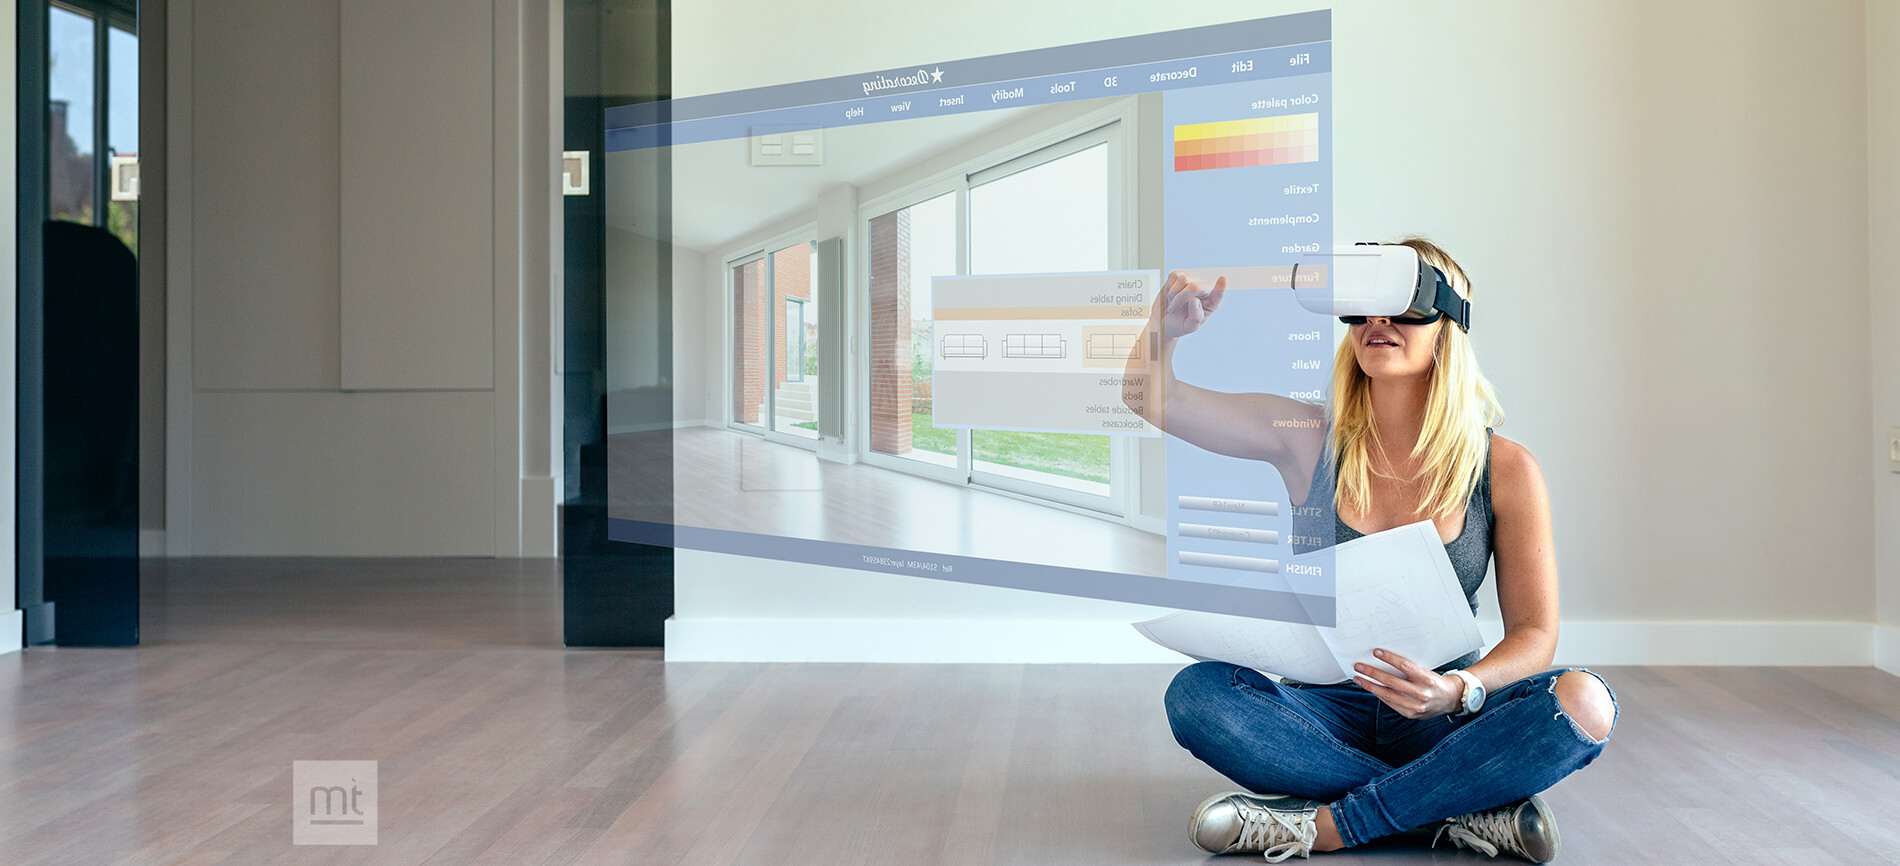
Augmented reality is the result of using technology to superimpose information — sounds, images and text — on the world we see. Augmented reality is the technology that expands our physical world, adding layers of digital information onto it. It defines the user experience that integrates virtual elements, whether in 2D or 3D, into the real world environment through the device's camera. It allows the users to interact with digital objects or characters with their own surroundings to create a unique experience. AR is still in development and multiple engineers and tech companies around the world are working to enhance it.
Augmented Reality Apps
AR apps are taking the world by storm, already reaching a multi-billion dollar market. You can find AR apps for all kinds of purposes, ranging from utilities, shopping, education, social media to gaming, all with an extra splash of fun.
Below are the most known augmented reality apps, just to show you what it can do.
Pokemon Go: This game app was raging back in 2016! Pokemon characters appear in the real world when you walk around. If you hunt one down, you can catch it by throwing a Pokeball at it, then raise them to be stronger. Friends can gather at a place together to play so it's great for socializing and it is fun. On top of that, local businesses can market their shop to attract players. Clever!
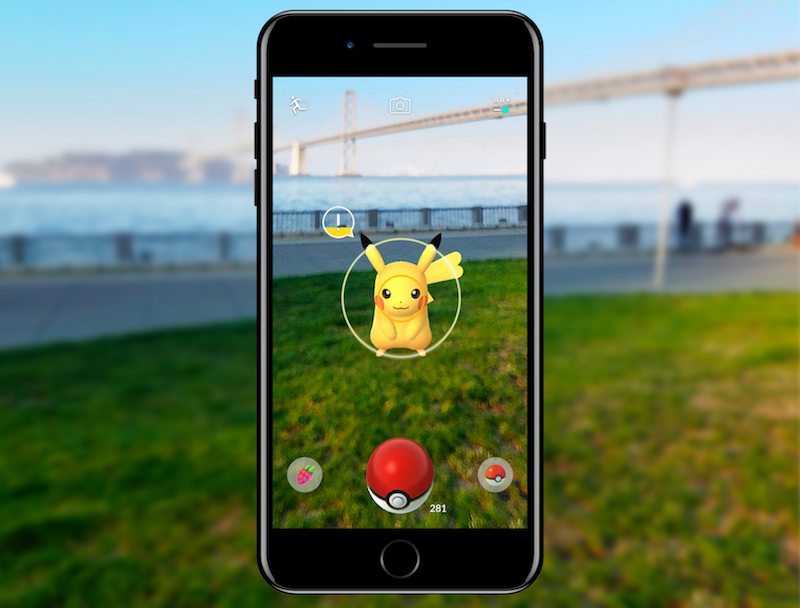
Pokémon Go creates an augmented reality experience. The game allows users to see characters bouncing around in their own town.
Ikea Place: Ikea's app allows the user to shop for 3D virtual furniture and place them within your space. Preview it first-hand how it fits in your room before buying it, quite an advantage I must say. It can save one time and trouble.
So here in the newly renovated basement, it looks quite empty. This space needs a couch! So let’s search for one. I like sectionals so I’m gonna select that category. I think the grey one would look nice here. Let’s try it. Now we are detecting the floor. Once it’s done, the couch just pops out on my screen. All I have to do now is to position it properly in my room and see if it fits well.
Snapchat: This social media app is known for its entertaining camera filters. Either adding animal parts to your face or swapping faces with another person, you can’t help but laugh at that. Then you snap a picture or short video and share it with your friends. Although Snapchat has been a step ahead with augmented reality using another technology to place digital features onto the real face, it now blends with new ARKit tool to enhance face tracking thanks to the TrueDepth camera of the iPhone X.
Who needs makeup anymore with Snapchat?
How does Augmented Reality work
AR can be displayed on various devices: screens, glasses, handheld devices, mobile phones, head-mounted displays. It involves technologies like S.L.A.M. (simultaneous localization and mapping), depth tracking (briefly, a sensor data calculating the distance to the objects), and the following components.
1. Cameras and sensors: Collecting data about user’s interactions and sending it for processing. Cameras on devices are scanning the surroundings and with this info, a device locates physical objects and generates 3D models. It may be special duty cameras, like in Microsoft Hololens, or common smartphone cameras to take pictures/videos.
2. Processing: AR devices eventually should act like little computers, something modern smartphones already do. In the same manner, they require a CPU, a GPU, flash memory, RAM, Bluetooth/WiFi, a GPS, etc. to be able to measure speed, angle, direction, orientation in space, and so on.
3. Projection: This refers to a miniature projector on AR headsets, which takes data from sensors and projects digital content (result of processing) onto a surface to view. In fact, the use of projections in AR has not been fully invented yet to use it in commercial products or services.
4. Reflection: Some AR devices have mirrors to assist human eyes to view virtual images. Some have an “array of small curved mirrors” and some have a double-sided mirror to reflect light to a camera and to a user’s eye. The goal of such reflection paths is to perform a proper image alignment.
Future of Augmented Reality
Research continues apace on including AR functionality in contact lenses, and other wearable devices. The ultimate goal of augmented reality is to create a convenient and natural immersion, so there's a sense that phones and tablets will get replaced, though it isn't clear what those replacements will be. Even glasses might take on a new form, as "smart glasses" are developed for blind people.
I hope you found the above information useful.
Now, let’s dive into the main part.
What is ARKit?
ARKit is the framework from Apple that handles the processing to build Augmented Reality apps and games for iOS devices. It is a high-level API supplying numerous and powerful features making a magical world come to life.
AR - OBJECT DETECTION
Your app provides reference objects, which encode three-dimensional spatial features of known real-world objects, and ARKit tells your app when and where it detects the corresponding real-world objects during an AR session.
The programming steps to scan and define a reference object that ARKit can use for detection are simple. (See “Create a Reference Object in an AR Session” below.) However, the fidelity of the reference object you create, and thus your success at detecting that reference object in your own apps, depends on your physical interactions with the object when scanning. Build and run this app on your iOS device to walk through a series of steps for getting high-quality scan data, resulting in reference object files that you can use for detection in your own apps.
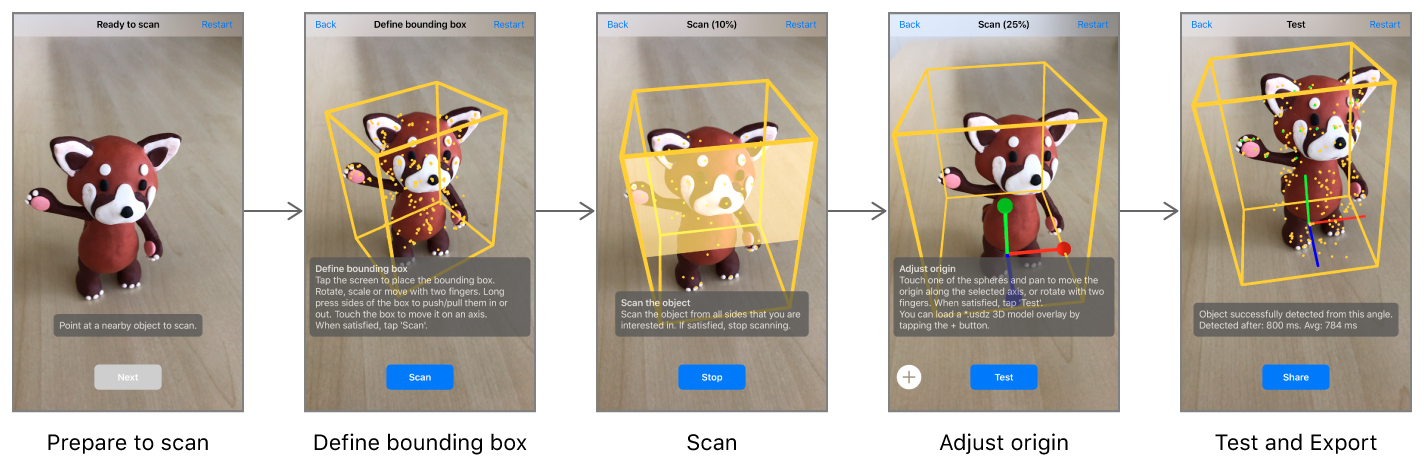
Choose an iOS Device.For easy object scanning, use a recent, high-performance iOS device. Scanned objects can be detected on any ARKit-supported device, but the process of creating a high-quality scan is faster and smoother on a high-performance device.
Position the object.When first run, the app displays a box that roughly estimates the size of whatever real-world objects appear centered in the camera view. Position the object you want to scan on a surface free of other objects (like an empty tabletop). Then move your device so that the object appears centered in the box, and tap the Next button.
Define bounding box.Before scanning, you need to tell the app what region of the world contains the object you want to scan. Drag to move the box around in 3D, or press and hold on a side of the box and then drag to resize it. (Or, if you leave the box untouched, you can move around the object and the app will attempt to automatically fit a box around it.) Make sure the bounding box contains only features of the object you want to scan (not those from the environment it’s in), then tap the Scan button.
Scan the object. Move around to look at the object from different angles. For best results, move slowly and avoid abrupt motions. The app highlights parts of the bounding box to indicate when you’ve scanned enough to recognize the object from the corresponding direction. Be sure to scan on all sides from which you want users of your app to be able to recognize the object. The app automatically proceeds to the next step when a scan is complete, or you can tap the Stop button to proceed manually.
Adjust origin.The app displays x, y, and z coordinate axis lines showing the object’s anchor point, or origin. Drag the circles to move the origin relative to the object. In this step you can also use the Add (+) button to load a 3D model in USDZ format. The app displays the model as it would appear in AR upon detecting the real-world object, and uses the model’s size to adjust the scale of the reference object. Tap the Test button when done.
Test and export. The app has now created an ARReferenceObjectand has reconfigured its session to detect it. Look at the real-world object from different angles, in various environments and lighting conditions, to verify that ARKit reliably recognizes its position and orientation. Tap the Export button to open a share sheet for saving the finished .arobject file. For example, you can easily send it to your development Mac using AirDrop, or send it to the Files app to save it to iCloud Drive.
To enable object detection in an AR session, load the reference objects you want to detect as ARReferenceObject instances, provide those objects for the detectionObjects property of an ARWorldTrackingConfiguration, and run an ARSession with that configuration:
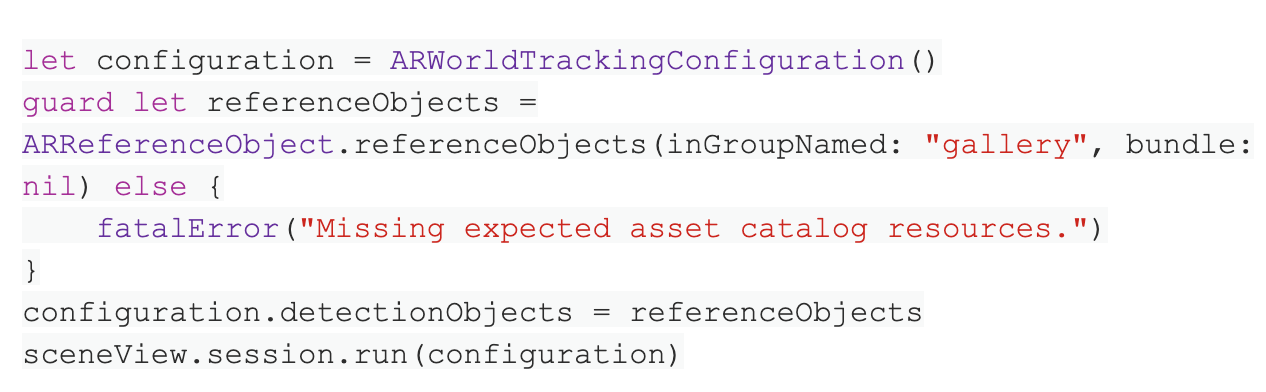
When ARKit detects one of your reference objects, the session automatically adds a corresponding ARObjectAnchor to its list of anchors. To respond to an object being recognized, implement an appropriate ARSessionDelegate, ARSCNViewDelegate, or ARSKViewDelegate method that reports the new anchor being added to the session. For example, in a SceneKit-based app you can implement renderer(_:didAdd:for:) to add a 3D asset to the scene, automatically matching the position and orientation of the anchor:
Create a Reference Object in an AR Session
This sample app provides one way to create reference objects. You can also scan reference objects in your own app - for example, to build asset management tools for defining AR content that goes into other apps you create.
A reference object encodes a slice of the internal spatial-mapping data that ARKit uses to track a device’s position and orientation. To enable the high-quality data collection required for object scanning, run a session with ARObjectScanningConfiguration:
For further details, kindly visit
https://developer.apple.com/documentation/arkit/scanning_and_detecting_3d_objects
For the reference of source code, please find following github link:
https://github.com/manekdilip/AR-Object-Detection_iOS
You can also check the youtube video using following link:
https://www.youtube.com/watch?v=tm3E1shjcjo
For best results with object scanning and detection, follow these tips:
1. ARKit looks for areas of clear, stable visual detail when scanning and detecting objects. Detailed, textured objects work better for detection than plain or reflective objects.
2. Object scanning and detection is optimized for objects small enough to fit on a tabletop.
3. An object to be detected must have the same shape as the scanned reference object. Rigid objects work better for detection than soft bodies or items that bend, twist, fold, or otherwise change shape.
4. Detection works best when the lighting conditions for the real-world object to be detected are similar to those in which the original object was scanned. Consistent indoor lighting works best.
AR - MARKER
Marker-Based AR is also called Image Recognition or Recognition based AR. This type of AR provides us more information about the object after it focuses on the recognition of objects. Marker-based AR technology has diverse uses according to market purposes. It detects the object in front of the camera and provides information about the object on the screen. The recognition of the object is based on the marker where it replaces the marker on the screen with a 3D version of the corresponding object. Therefore, the user can view the object in more detail and from various angles. Apart from that while rotating the marker user can also rotate the 3D imagery as well. This acts as a reference for the AR app running on the system.

We call the distinctive picture that can be recognised by the device, the marker. A marker can be anything, as long as it has enough unique visual points. Images with lots of corners and edges work especially well, our AR Creator has an in-built tool to let you check if your image is a suitable marker. Typical examples include any print media, such as logos, packaging, posters or brochures. Or objects, often a product itself such as a drinks can, bottle, or even machinery.
Enable Image Detection
Image detection is an add-on feature for world-tracking AR sessions. (For more details on world tracking, see Tracking and Visualizing Planes.)
To enable image detection:
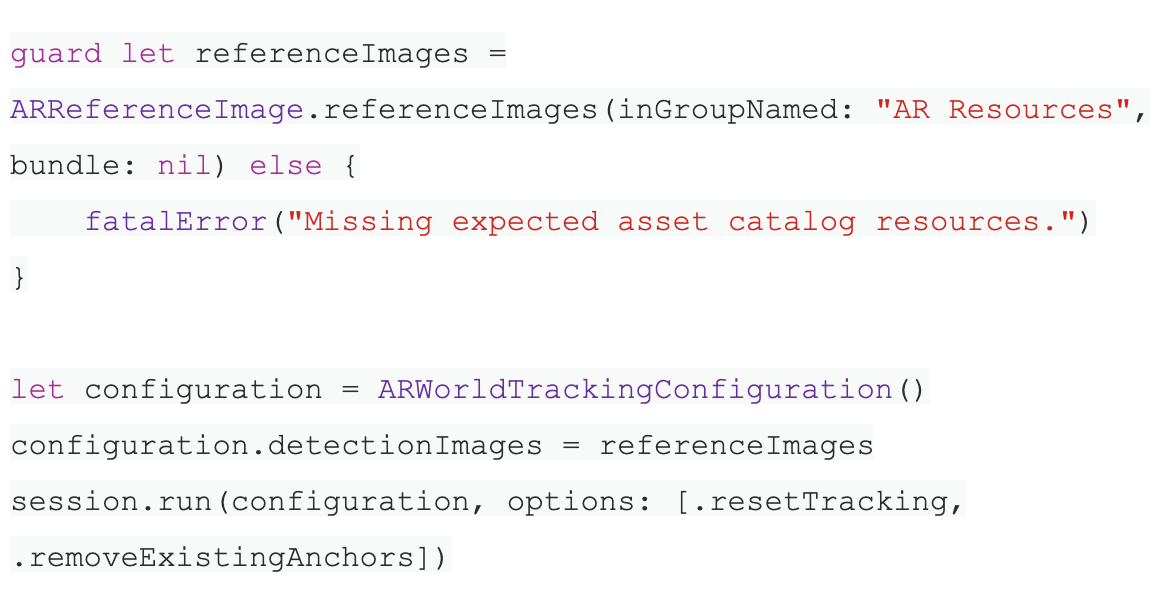
Load one or more ARReferenceImageresources from your app’s asset catalog.
Create a world-tracking configuration and pass those reference images to its detectionImages
Use the run(_:options:)method to run a session with your configuration.
The code below shows how the sample app performs these steps when starting or restarting the AR experience.
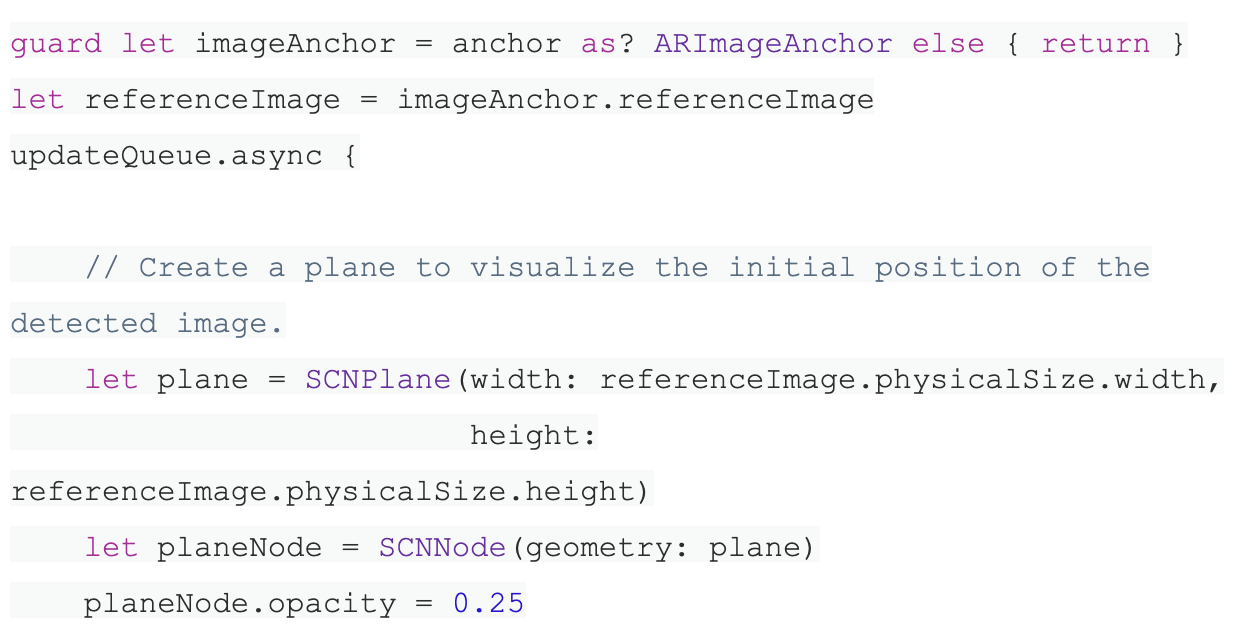
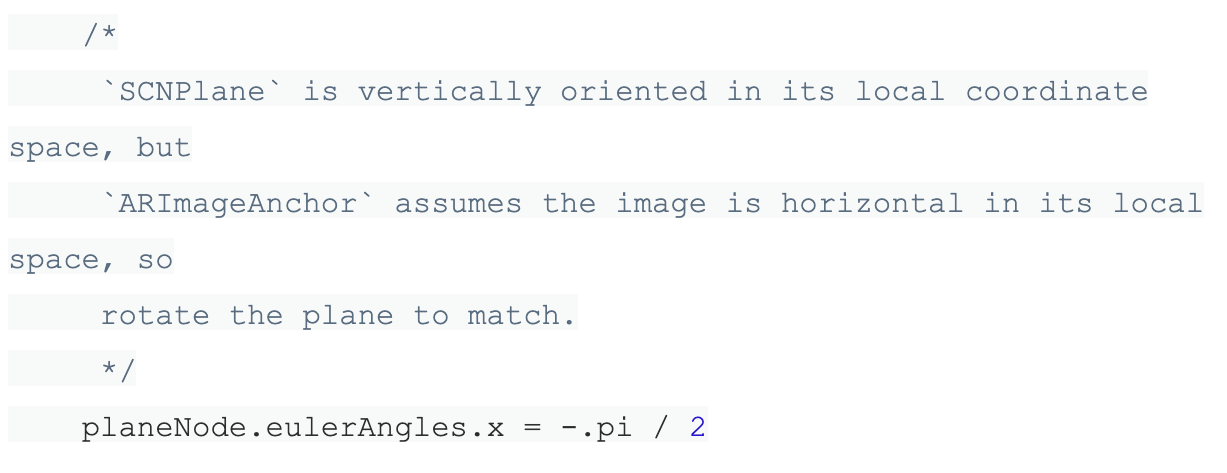
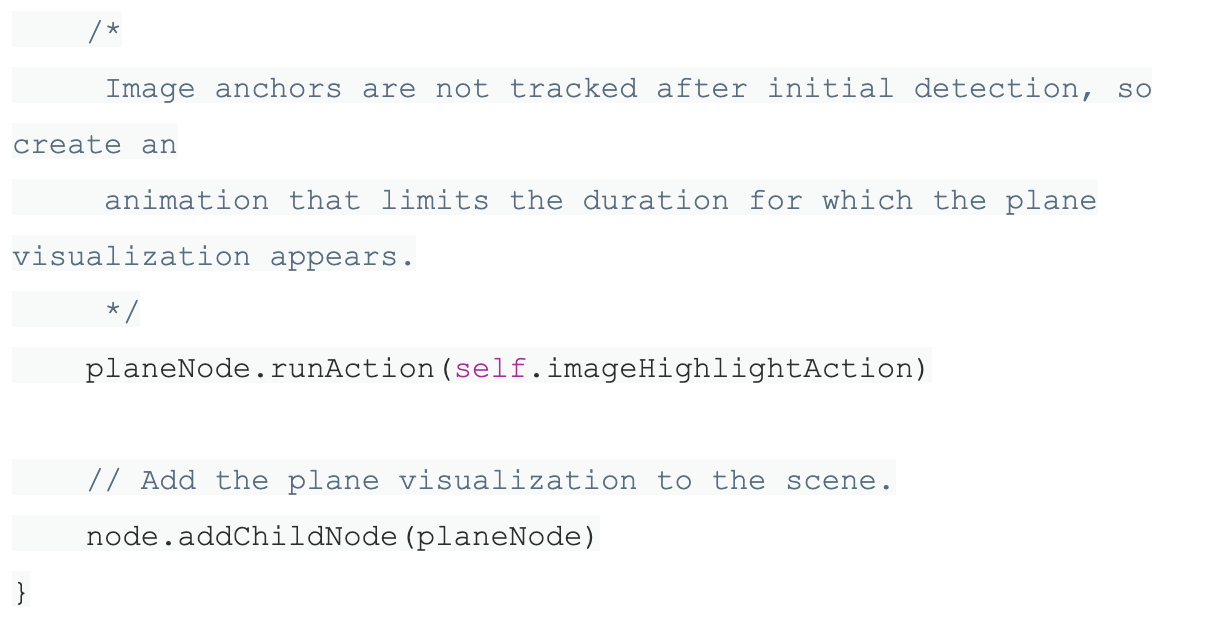
Visualize Image Detection Results
When ARKit detects one of your reference images, the session automatically adds a corresponding ARImageAnchor to its list of anchors. To respond to an image being detected, implement an appropriate ARSessionDelegate, ARSKViewDelegate, or ARSCNViewDelegate method that reports the new anchor being added to the session. (This example app uses the renderer(_:didAdd:for:) method for the code shown below.)
To use the detected image as a trigger for AR content, you’ll need to know its position and orientation, its size, and which reference image it is. The anchor’s inherited transform property provides position and orientation, and its referenceImage property tells you which ARReferenceImage object was detected. If your AR content depends on the extent of the image in the scene, you can then use the reference image’s physicalSize to set up your content, as shown in the code below.
Be aware of image detection capabilities. Choose, design, and configure reference images for optimal reliability and performance:
1. Enter the physical size of the image in Xcode as accurately as possible. ARKit relies on this information to determine the distance of the image from the camera. Entering an incorrect physical size will result in an ARImageAnchorthat’s the wrong distance from the camera.
2. When you add reference images to your asset catalog in Xcode, pay attention to the quality estimation warnings Xcode provides. Images with high contrast work best for image detection.
3. Use only images on flat surfaces for detection. If an image to be detected is on a non planar surface, like a label on a wine bottle, ARKit might not detect it at all, or might create an image anchor at the wrong location.
4. Consider how your image appears under different lighting conditions. If an image is printed on glossy paper or displayed on a device screen, reflections on those surfaces can interfere with detection.
Apply Best Practices
This example simply visualizes where ARKit detects each reference image in the user’s environment, but your app can do much more.
Follow the tips mentioned in the following link to design AR experiences that use image detection well.
https://developer.apple.com/documentation/arkit/detecting_images_in_an_ar_experience
For the reference of source code of AR - Marker based object detection, please find following github link:
https://github.com/manekdilip/AR-with-Marker---iOS
You can also check the youtube video using following link:
iOS Device Compatibility
ARKit requires iOS 11.0 or later and an iOS device with an A9 or later processor. Some ARKit features require later iOS versions or specific devices. ARKit also uses a device camera, so you need to configure iOS privacy controls so the user can permit camera access for your app.
How to handle device compatibility support depends on how your app uses ARKit:
1. If the basic functionality of your app requires AR (using the back camera): Add the arkit key in the UIRequiredDeviceCapabilitiessection of your app's Info.plist file. Using this key makes your app available only to ARKit-compatible devices.
2. If augmented reality is a secondary feature of your app: Check for whether the current device supports the AR configuration you want to use by testing the isSupportedproperty of the appropriate ARConfiguration
3. If your app uses face-tracking AR: Face tracking requires the front-facing TrueDepth camera on iPhone X. Your app remains available on other devices, so you must test the ARFaceTrackingConfiguration.isSupportedproperty to determine face-tracking support on the current device.
Hope, you found this article useful.
For any query or suggestion, you are very much welcome to contact us at the same address mentioned above.

Nikhil Solanki
Mobile Lead
Nikhil Solanki has 10+ years of experience in App Development and currently works as the Mobile Lead at ManekTech. He is an experienced Mobile lead with a demonstrated history of working in Mobile's information technology and services industry.


Subscribe to Our Newsletter!
Join us to stay updated with our latest blog updates, marketing tips, service tips, trends, news and announcements!